Disassembling a bed frame might seem simple, but doing it the right way can save you from scratched floors, damaged walls, and lost screws. Whether you're preparing for a move, selling furniture, or need it hauled away, following the proper steps ensures a smoother experience.
At 239 Haulers, we’ve helped hundreds of customers in Naples, Bonita Springs, and Golden Gate with full-service furniture removal. We service all of Collier and Lee County. But if you want to break it down yourself, here’s your complete guide to disassembling a bed frame safely and efficiently.
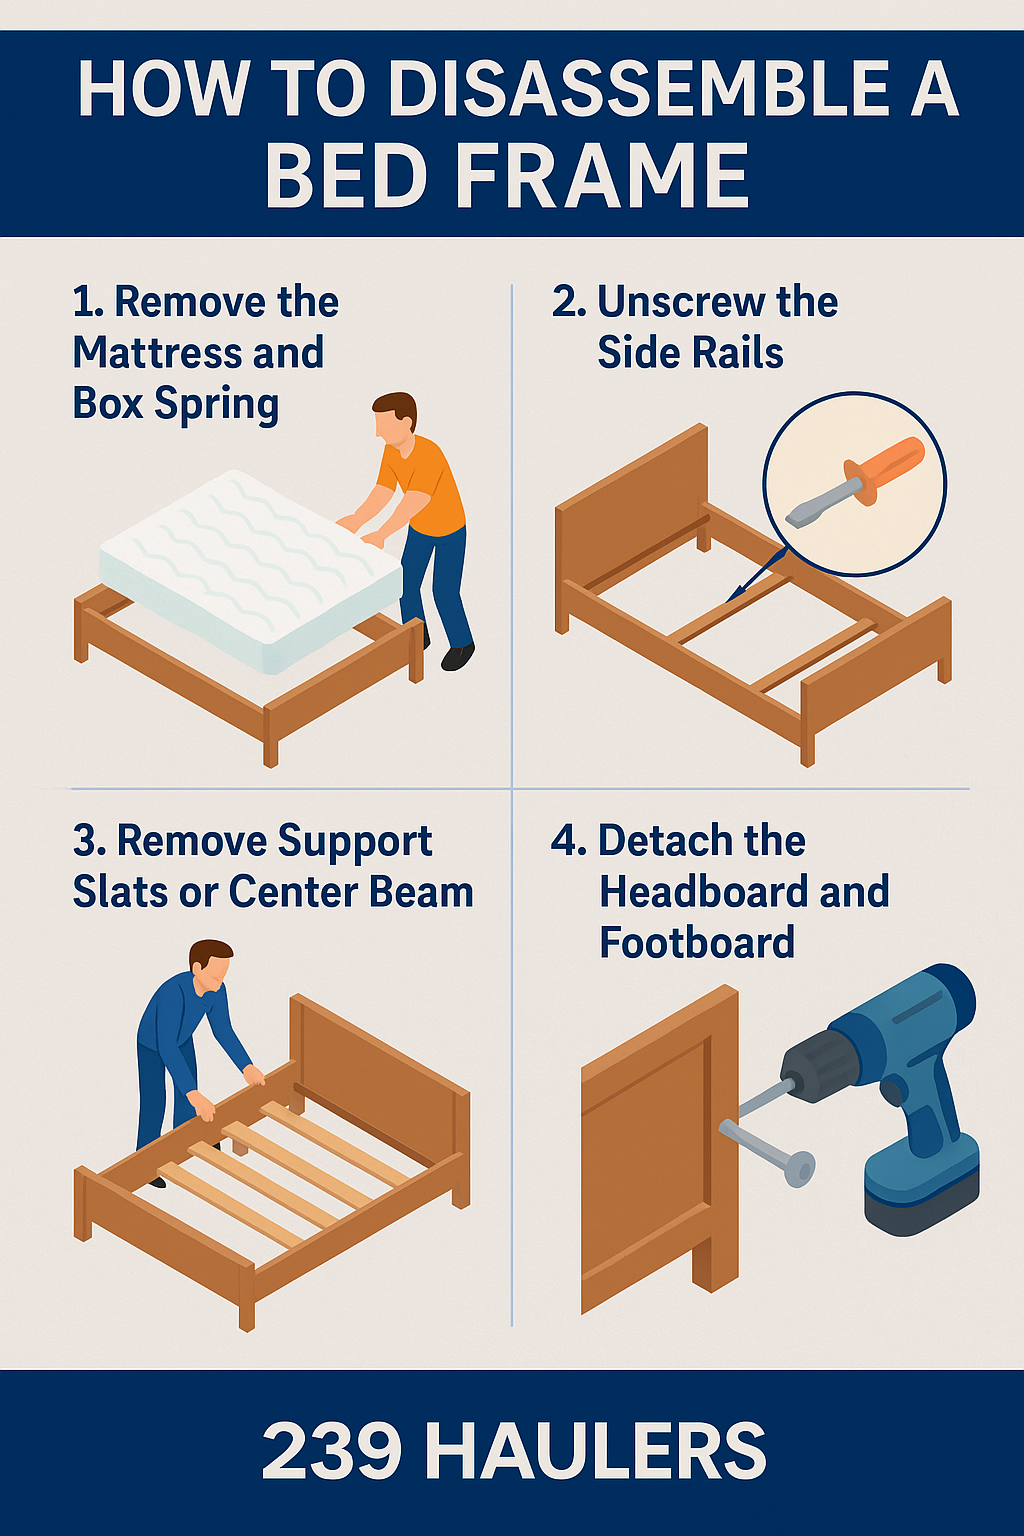
Step-by-Step: How to Disassemble a Bed Frame
Quick Answer:
To disassemble a bed frame, remove the mattress and box spring, unscrew the side rails from the headboard and footboard, remove any slats or center supports, and carefully pack the hardware for reassembly or disposal.
1. Remove the Mattress and Box Spring
Start by stripping the bed of all sheets, blankets, and pillows. Carefully lift and remove the mattress and box spring, placing them out of the way in another room. If either is damaged, sagging, or no longer in use, this is a good time to schedule mattress disposal or recycling.
• Strip off all bedding
• Move the mattress and box spring to another room
• Vacuum or clean the area under the frame
Pro Tip: Mattresses and box springs can be awkward to carry—use moving straps or ask for help to avoid injury or scuffing walls. If your mattress is worn or sagging, now’s a great time to schedule mattress removal with 239 Haulers.
2. Unscrew the Side Rails
Use the appropriate tool—usually a screwdriver or Allen key—to detach the side rails from the headboard and footboard. Some metal frames may use wingnuts or brackets instead of screws. Keep track of all screws, washers, and bolts by placing them in a small, labeled container or plastic bag.
• Use a screwdriver or Allen key depending on your frame type
• Carefully remove bolts or brackets connecting side rails to the headboard and footboard
• Keep small parts in a Ziplock bag labeled “bed hardware”
Pro Tip: If your frame has metal connectors, gently tap with a rubber mallet to loosen tight fittings without damaging the finish.
⚠️ Be gentle when separating older wooden frames—they can crack under pressure.
3. Remove Support Slats or Center Beam
Once the side rails are detached, remove any slats that rest across the bed frame. Some may lift out easily, while others may be screwed or clipped in place. For beds with a center support beam, unscrew or unbolt it before removal.
• Take out wooden or metal slats
• If slats are screwed in, use a power drill to save time
• Some beds have a center beam with extra support legs—remove this next
Note: Label slats or supports if they’re not identical—this helps with reassembly later or makes donation easier.
4. Detach the Headboard and Footboard
Carefully remove any remaining bolts or brackets connecting the headboard and footboard to the frame. These components can be heavy or bulky, especially with wood or upholstered designs, so use a second person to help you carry and maneuver them.
• Unbolt the remaining connections
• Ask for help lifting large or heavy pieces
• Wrap them in blankets or padding to prevent wall damage when moving
Pro Tip: Protect walls and doorways by wrapping large pieces in moving blankets or towels before moving them. Upholstered headboards often require a second person to maneuver safely through doorways.
5. Organize and Pack Hardware
Keep all screws, bolts, and hardware in a labeled Ziplock bag or small container. Tape the bag securely to one of the larger frame pieces so it’s not lost during the move. Stack disassembled parts together in a clean, dry space for easy pickup, donation, or storage.
• Put all screws, bolts, washers, and nuts in a bag
• Tape the hardware bag to one of the disassembled parts
• Stack the frame parts neatly for transport or pickup
Staying organized not only saves time later—it also helps if you're reselling or donating your bed frame.